Monday, March 25, 2013

Oats & Peanuts Ladoo

This month for "Something Sweet" I have invited " Divya Pramil of You Too Can Cook " to share a wonderful recipe with all of us.In my words her space is filled with yummy recipes & beautiful pictures. Do take some time & visit her space here.
In Her words
When Sreevalli, asked me to do a for a guest post I was not able to send her one immediately, but she was kind and patient enough and gave me enough time to send her a post. Though I was ready with the recipe, I had my special post (300th post) coming up so I had to delay this guest post, which when I explained to her, she kindly understood and obliged. (Thank you so much Sreevalli). I came to know about Sreevalli and her blog recently, the best thing that caught my attention immediately was her brilliant and clean blog design and clicks, needless to say she has good collection of recipes too with drool-worthy pictures that will push you to try some. 


As per her request I made a simple delectable sweet with oats and peanuts, that is both healthy and delicious. Its so easy to make and way more healthier than ghee sweets. Moreover it keeps well for more than a week or even 10 days, in normal room temperature. The cardamom pods added gives the ladoos a very appetizing aroma and flavor, whereas peanuts and oats combines together to make a delicious combo. These ladoos have a powdery texture and melts in your mouth as you bite, you will definitely enjoy relishing the flavors in it. You need a very few minutes to make these and they make a very delightful and sweet evening snack. If you are conscious about the calories that sugar can give you can try replacing with jaggery or palm jaggery. So now lets move on to the recipe. Hope you like it. Thanks again Sreevalli for the opportunity..!!


Makes 6 small ladoos 
Total Preparation Time - 15 to 20 minutes

INGREDIENTS
  1. Oats - 1 cup (50 grams)
  2. Peanuts / Groundnuts - 1/2 cup (50 grams; roasted & skinned)
  3. Sugar - 1/2 cup (5 spoons / 50 grams)
  4. Cardamom pods - 2 
  5. Milk - 2 to 3 spoons or as required


PREPARATION METHOD

  • Dry roast (i.e. roast in pan without oil or fat) peanuts and oats together in a medium flame for about 3 to 4 minutes. 
  • When done remove from flame and set aside until it reaches a bearable temperature. 
  • Now add this roasted oats peanut mixture and sugar into a blender and grind into a fine powder. 
  • Then remove from the jar and empty it on a plate. Sprinkle milk little by little and simultaneously rub the mixture well using your hands. Do this until you can press some flour well into a firm ball that does not fall apart. 
  • Then take some amount of the flour and make balls by pressing firmly. 
  • Serve or store in airtight boxes. Keeps well for 7 to 10 days when stored in an airtight container. 
 
TIP 1: You can try the same ladoos without peanuts. 

TIP 2: You can add some ghee and make the ladoos if you want it to be more rich. 

TIP 3: Instead of sugar you can use palm jaggery also, it will be more healthy. 

Healthy and tasty ladoos are now ready!! You will love the flavors for sure!!

I love to thank Divya Pramil for sending this delicious recipe to my guest post. 


Wednesday, February 13, 2013

Soft Garlicky Bread Sticks with Dipping Sauce - A Guest Post

For the Guest post series of "Something Sweet " I have invited "Julie of Erivumpuliyumm" to share a yummy recipe here. She has a beautiful space with lots of wonderful recipes which you would love try on.
Coming to the post in her words.. 
Sreevalli @ Ammaji's Recipes asked me if I can join her guest post series"Something Sweet", I happily accepted the request.I was a bit busy at home but she gave me ample time to decide the recipe and the date too,so sweet of her.Sreevalli has a wonderful space and an experienced blogger since 2009,admire her lovely clicks & yummy recipes.Thank you Sreevalli for making me a part of your guest post series,feeling very happy.


This time,I would like to share soft garlicky bread sticks.The name itself sounds flavorful.Isn't it?? I love those long cylindrical shaped soft ones a lot.Perfect with a bowl of soup or great with some dipping sauce.If you love those from pizza huts,you will definitely love this garlicky ones too with a homemade dipping sauce.Do give this a try & Enjoy !!!


    Servings ~ 17-18 bread sticks
    Ingredients
    1.all purpose flour 3 cups
    parmesan cheese 3 tablespoons grated sugar 2 tablespoons
    garlic powder 3 teaspoons
    salt 1 1/4 teaspoons
    minced fresh basil  3/4 teaspoon or 1/4 teaspoon dried basil
    2.active dry yeast 2 teaspoons
    water 1 cup plus 2 tablespoons (70° to 80°)
    olive oil 2 tablespoons
    To brush
    butter, melted 1 tablespoon
    Dipping sauce
    tomato sauce 3/4 cup
    oregano 1 tsp
    italian seasoning 1/2 tbsp
    garlic powder 1/2 tsp

    Method:

    Bread Sticks
    • Take leukwarm water or microwave water on high for 45 secs.Add yeast to this and let it stand to become frothy.(about 5-7 mins)
    • In a large bowl,combine all the ingredients listed under 1.Mix with a wire whisk to combine.
    • Add the frothy yeast mixture and make a dough that is not very sticky and not very smooth.Add in the olive oil half in the bowl and half on top of the dough.Combine well.
    • Turn dough onto a lightly floured surface. Divide into 20 portions. Shape each into a ball; roll each into a 9-in. rope. Place on greased baking sheets/parchment paper lined tray. Cover and let rise in a warm place for 40 -60 minutesor until doubled.
    • In the mean time,preheat oven to 350 degrees.
    • Place in the oven and bake at 350° for 18-22 minutes or until golden brown.(Mine was done at 17-18 mins).Remove to wire racks to cool. Brush warm breadsticks with butter.
    Dipping Sauce
    • Simmer the tomato sauce along with the seasonings in  a pan for 10 minutes and enjoy !!

     Notes
    * I used dry basil in this recipe.
    * I feel 9" was too long,you can always reuce the size to 7".
    * Brushing the top with butter after bake prevents the crust from drying.
    * You can use bread flour too instead of all purpose flour as the original recipe calls for it.
    * You can alter the amount of seasoning as per tastes in the dipping sauce or use a store brought dipping suace too !!


    I would like to thank "Julie" for sharing this wonderful recipes with all us today. Here is small flower as a token of thanks.


    Wednesday, February 6, 2013

    Galleria of Black & White Wednesdays #69

    I want to thank one and all participated in Black & White Wednesday event.
    It was a delight to see all the beautiful shots in my place. Enjoy the virtual delight 
    for now & do check on Cindy's place for upcoming schedule. 

    Pizza for Dinner "by Meena Selvakumaran of EncourageSpice

    Baby loves Cuppycake " by Khansa Erooth of A novice Cuisine

    Brasserie Window " by Rosa of Rosa's Yummy Yums

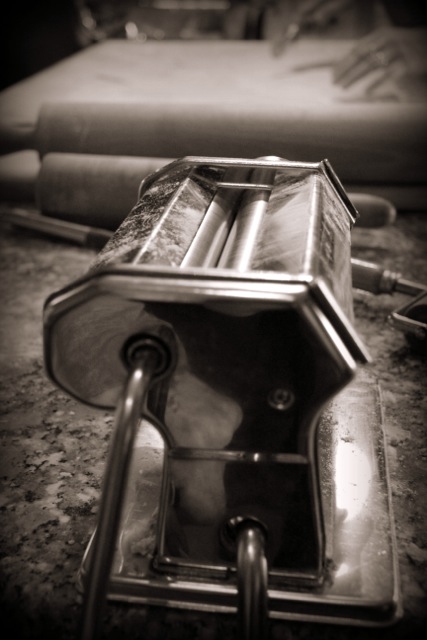
    Kitchen Tools Ready " by Cinzia of Cindystar

    Ready to go " by Cinzia of Cindystar

    Properly Cut " by Cinzia of Cindystar

    Vintage Miss Laminate " by Cinzia of Cindystar

    Nicely Deep Fried " by Cinzia of Cindystar

    Huge baskets to enjoy " by Cinzia of Cindystar

    The Table is Set " by Simona of Briciole

    ChruÅ›cik " by Susan of The Well-Seasoned Cook

    Pistachio Cookies by me


    Wednesday, January 30, 2013

    Baked Goodies


    Announcing Black & White Wednesday

    I'm so happy to announce the Black and White Wednesday #69 event @ my blog.This event was initially started by Susan of The well-Seasoned CookWich was passed on & now being managed by Cinzia of Cindystar.


    Simple rules: 
    1. Send in a Black & White or a monochromatic pic of a food or something represents food.
    2. A file size should be as mentioned below:

    • For portrait/500 wide & 700 long
    • For landscape/700 wide & 500 long or 600 square

    3. Send in your Pics to Valli.sunil@gmail.com with below details: 

    • Subject : BWW#69
    • Name
    • Title of pic
    • Url to your page 

    4. Event starts from 30th of Jan13 to 6th of Feb13.
    5.Non bloggers can send in your pics to the above mail id & I would be happy to post it for you. 
    6. For queries you can leave a comment below.

     
    Ammaji Recipes

    Tuesday, January 29, 2013

    Monday, January 28, 2013

    Corn with Black eyed pea Salad


    I'm not kind of a salad person but occasionally I love indulging in them. The one reason I go for them is they make you feel full & helps you in diet. So whenever I want to go on a crazy diet I make one of this for myself & enjoy it to the fullest. 
    Today I'm sharing a refreshing salad for upcoming hot summers.This salad is packed with protein, carbs & also goodness of the greens. 


    Ingredients
    1 Cup cooked black eyed beans
    1/2 Cup uncooked sweet corn
    1/2 Cup finely chopped brussel sprouts
    1/2 Cup diced scallions
    Few pomegranate arils to sprinkle on top
    For Dressing 
    1 Tbs lemon juice
    1 Tsp freshly grounded black pepper
    Salt (Adjust acc. to your taste)


    In a large bowl add black eyed peas, sweet corn & diced scallions.For blanched brussels follow the below instructions.
    Blanched brussel sprouts:
    Take a wide pan with full of water & a 1tsp of salt. Place it on a stove top & bring water to boil.
    Mean while in a bowl take lots of Ice cubes & fill it with water. To that add 1 Tsp salt & dissolve it. 
    Now add the chopped brussels to boiling water & cook them 4 to 5 mins. Mean while the sprouts change to brighter green & also will be perfectly cooked with out leaving their crispy texture. Strain them into a bowl & add them immediately to iced water. Now strain the iced water & add sprouts to salad. Mix them well. 


    In a small bowl mix lemon juice, pepper powder & salt. Mix it well till salt gets disolved. Now mix dressing with salad & sprinkle few pomegranate arils on top. 


    Serve it right away & enjoy.


    Thursday, January 10, 2013

    Ada - Guest post by Reshmi of Funwidfud


    I'm again back with guest post " Something Sweet" after a long time. Today our guest Reshmi of Funwidfud is here to share a traditional kerala recipe with all of us & she is also the first guest in my blog this year.. :)
    In Reshmi's words:
    When  Sreevalli of Ammaji Recipes asked me for a guest post some time back,  I was totally hooked up with multiple jobs.. but before I could tell a list of tasks in front of me she told that I can chose a later date, for which I accepted..I totally left it there and was moving around when around the corner I remembered about the guest post. Now cooking was fine but clicking it was very difficult..Finally when I saw a little sunshine I went with this simple but a traditional recipe of Kerala.
          Ada is a sweet delicacy from Kerala.These are steamed  rice pockets filled with sweet coconut filling.  It is know as ela ada because of the way it is made. Usually plantain leafs are used to cook them, but due to the unavailability of them here I have experimented with parchment paper and its a success. They are enjoyed as snack/sweet during evenings with tea as well as can act as breakfast if you have a sweet tooth in the morning.


    Ingredients
    Rice Flour-1 cup(pathiri/puttu/idiyappam powder)
    Salt- pinch
    Water-11/4 cup
    Coconut oil-1/2 tsp
    Grated Coconut-1/2 cup
    Jaggery-2 cubes
    Rock sugar/kalkandam-2 tbsp(optional)
    Cardamom seeds-from 2(crushed)
    Parchment paper- 4 to 5 nos( 10" square approx.)


    Method of preparation:
    1. In a bowl add rice flour, coconut oil and salt.
    2. Bring water to rolling boil  and turn off the heat. Add 1 cup of water to rice powder and mix well with a spoon. Close the vessel and set aside for 10 minutes.
    3. Now when the dough is warm to touch mix it with hands to form a soft and pliable dough. you can add more(1/8 cup) of the boiled water if needed.
    4. Mix the grated coconut along with powdered jaggery, rock sugar and cardamom powder and mix well and set aside.
    5. Now take a lemon sized ball of dough, place it on the parchment paper, grease your hands with coconut oil and flatten the dough with your fingers to a circle of equal thickness.
    6. Now add 3 to 4 tbsp coconut filling in the center and fold the parchment paper to half and press the sides of dough so that it sticks together.
    7. Heat water in a steamer and when steam starts to come place the parchment paper into it with the open end folded and placed to bottom.
    8. Steam it for 5 to 7 minutes and remove it on to a plate. Continue cooking for the whole dough.
    9. Serve warm.


    Notes:
    1. You can add raisins, cashews to the filling.
    2. Adding more filling is up to you. In that case you will require to increase the amount of coconut, jaggery.
    3. This ada is usually made using banana leaf. Since that is not available here I made using parchment paper. If cooking with plantain leaf you have to follow the same method.

    I want to thank Reshmi for making this post possible. 


    Tuesday, January 1, 2013

    Eggless Pistachio Cookies


    Happy New Year to all.

    On the occasion of new year I'm sharing this borrowed recipe from Food Network magazine.This is a eggless recipe with a crunchy & crispy texture. You can also feel pistachio's in every bite & the best part is you can replace pistachio's with your favorite nut.


    Yields : 20 Cookies
    Ingredients
    3/4 Cup + 2Tbs all purpose flour
    2/3 Cup unsalted pistachios 
    1 Tsp baking powder
    1/2 Cup icing sugar
    1/2 Tsp salt
    1/2 Cup butter at room temperature 
    1 Tsp vanilla extract


    Preheat oven @350degrees. On a baking sheet spread the pistachios & bake them for 10 to 12 mins. Now remove them from oven & you can smell the aroma of roasted nuts. Allow them to cool. Sift all purpose flour,baking powder & salt in a bowl. Grind nuts & 2 tbs all purpose flour to a smooth powder.
    In a big bowl beat sugar, butter & vanilla extract until light & fluffy.Now mix the dry ingredients with butter mix & to that add the nut powder & roll it to a rectangular shape.
    Cover this dough in a plastic wrap & to make it firm  refrigerate it for at least 2hrs or whole night.


    Preheat oven @350degrees. Mean while line your baking sheets with parchment paper. Roll the dough in between 2 pieces of parchment paper & cut it using a shape as you want. 
    Now line the cookies on prepared baking sheets. Bake them for 10 to 12 mins until golden brown.
    Cool them for 3 mins on baking sheets & move them on to a rack to cool further.


    Serve them with milk, coffee or tea. They are just yum.

    Note: 
    1.You can replace pistachio with any other nut.
    2. I refrigerated the for 2 hrs & it was nice enough to handle. 
    Or you can just sprinkle a little flour & roll.